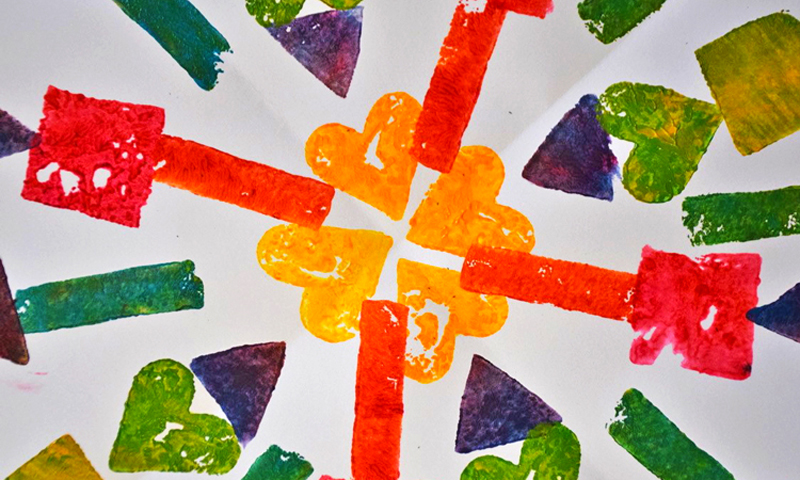
Upper Primary Potato Printing
Year Levels: 4 – 6
with Kylie Wickham

Click Here to download Lesson Plan
Overview
Students often explain pattern as a regular recurring shape: square, circle, square, circle or red, blue, red, blue etc.
In this activity, students are exploring pattern making that can be both regular and irregular in design.
Discuss
Printmaking is a subject diverse with techniques and outcomes. In this activity, students will start with a fundamental technique to printmaking – potato printing. Students will explore shape, pattern and symmetrically to create complex patterns.
Art Elements & Principles
Pattern, Shape, Colour
Cross-Curriculum / Capabilities Links
Language, Mathematics, Science
Vocabulary
Design, decoration, pattern, regular, irregular, shape, composition, consistent, print, stamp, symmetry
Learning Objectives
Students will:
- Use basic shapes to create complex patterns.
- Use mathematics, shape, symmetry to help design patterns.
- Explore mark making and colour mixing
Make
Create Artwork

Step 1: Students will need several potatoes of different sizes. Begin by cutting the potato in half. For complex stamp shapes, you can use a cookie cutter and a knife / stanley blade.
*Some students may need to be supervised or have an adult or older sibling’s assistance with cutting / using a knife.
*Important: Please always be safe and careful when using sharp cutting tools with children.
Step 2:
Using a cookie cutter:
Press cookie cutter stencil into the middle of the potato and run a knife from the outer edge of potato until it contacts the cookie cutter. Cut away excess potato.
Not using a cookie cutter:
Simply carefully cut an array of shapes into your potato.
Some potatoes do not need a shape cut into them at all, you can just use the shape of the half-potato as is.

Step 3: Take a sheet of A3 paper and fold from one corner to the opposite diagonal edge. Cut away excess paper – now you have a square piece of paper.
Next, fold the paper from corner-to-opposite-corner in the other direction. Your paper is now divided into four triangle sections. The cross-point of the two fold lines will give you the centre of the paper to work from.

Step 4: Take a palette (or paper plate) and pour out some small blobs of paint. Use the three primary colours, leaving a space between each colour to allow mixing of secondary colours. Take a sponge or dabber and apply paint to your first potato stamp shape.
Step 5: Begin in the centre of your square and work symmetrically. Do this by printing your shape once into each of the four sections, turning as you go. This will create a “mirror” effect.
Step 6: Take a new stamp shape, change colour, and repeat the process.

Step 7: Repeat this process over and over, creating more and more complex symmetrical patterns and mixing paint to create new colours, until you have reached the edge of your paper.
*You may wish to go back into your work and print shapes within the blank spaces.
Extension
Take it a step further…

Step 1: As you are working you may want to keep a separate piece of paper next to you where you can randomly stamp excess colour of potato. This will end up being a work in itself. You can compare the different pattern outcomes at the end of your lesson.
*A younger sibling may do this with you. While you create a regular pattern, your sibling might create an irregular pattern.
Discussion / Reflection
- Can you give the pattern you made a name?
- Did you discover new shapes when printing?
- What is a shape called with no name?
- What did you learn?
Materials & Equipment
- Potatoes
- Acrylic Paint (Primary Colours; Red, Blue, Yellow)
- A3 Paper
- Cutting Knife
- Paint Palette (or Paper Plate)
- Sponge / Foam dabber
- Cookie Cutter (optional)
Don’t have these materials at home?
Click Here to view recommended materials
Inspiration
Related Artwork, Links & Sources
Investigate patterns, shapes, and pattern making.
Search online or in books or magazines for images of decorative tiles as inspiration. Particularly Spanish, Portuguese, Mexican and Moroccan style tiling techniques.
Share Your Outcomes!
How did you go!? We’d love you to share your artwork with us on Facebook or Instagram!
#zartart

