Lower Primary Potato Printing
Year Levels: Foundation – 2
with Kylie Wickham

Click Here to download Lesson Plan
Overview
This activity is designed to introduce students to printmaking techniques through stamping. Students will make several sheets of stamped paper and explore pattern through repetitive shape stamping. Students will then use their imagination to extend their prints to create playful outcomes.
Discuss
- Explore pattern through repetitive shape stamping.
- Using imagination to extend.
- Creating work through playful experiences and humour
Art Elements & Principles
Pattern, Shape, Colour
Cross-Curriculum / Capabilities Links
Language, Mathematics, Science
Vocabulary
Shape, square, circle, triangle, rectangle, semi-circle, pattern, mark, stamp, print, pattern, red, yellow, blue
Learning Objectives
Students will:
- Identify and name shapes
- Discover how a shape can be transferred onto paper by printing method
- Understand that when one shape is repeated it becomes a pattern
- Use shape to create a picture
- Mix primary colours to create secondary colours
Make
Create Artwork

Step 1: Students will need several potatoes of different sizes.
Begin by cutting the potato in half. For complex stamp shapes, you can use a cookie cutter and a knife / stanley blade to get started.
*Some students may need to be supervised or have an adult or older sibling’s assistance with cutting / using a knife.
*Important: Please always be safe and careful when using sharp cutting tools with children.
Step 2:
Using a cookie cutter:
Press cookie cutter stencil into the middle of the potato and run a knife from the outer edge of potato until it contacts the cookie cutter. Cut away excess potato.
Not using a cookie cutter:
Simply carefully cut an array of shapes into your potato.
Some potatoes do not need a shape cut into them at all, you can just use the shape of the half-potato as is.

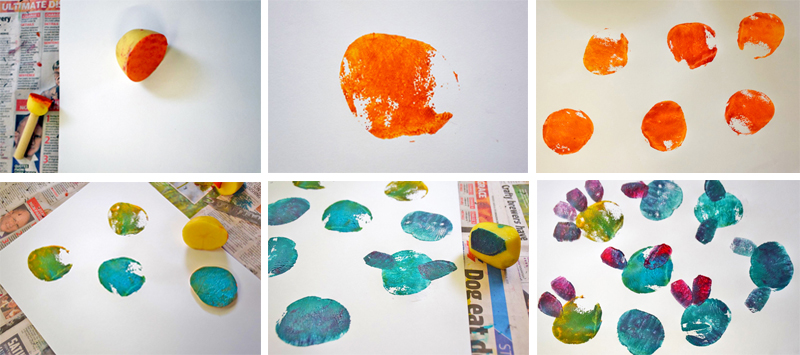
Step 3: Start with just half a potato. Dip the potato flat surface into some acrylic paint, then press onto paper to make a print.
Fill a page with ‘potato half’ prints. Make sure you leave a space between each print.
Set aside to dry.
Step 4: Next, take a fresh sheet of paper and one of your potato stamps with shapes cut into it.
This time add the paint with a dabber and proceed to stamp randomly all over the paper.
Step 5: Take a new shape and stamp more onto the same piece of paper. Repeat the process until the paper is full.
Ask your students:
Do you think this a pattern on the piece of paper?
Remember that Pattern is anything that is repeated. Explain this, and perhaps ask again. (Students of this age often think pattern must be represented neatly in a line)

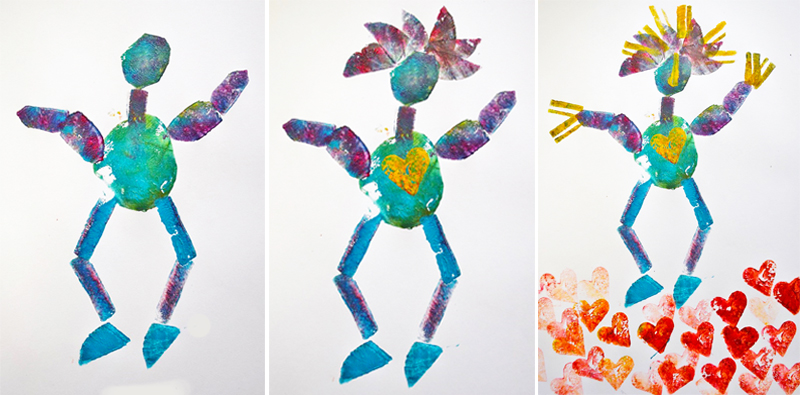
Step 6: Take a new third sheet of paper. Ask your students if they can create a picture by printing the different shapes/stamp together.
When shapes are added together, they form pictures.
If the students don’t know what to do, suggestions or prompts can be made. Ask questions. Are you thinking of a dinosaur, insect, flower etc?

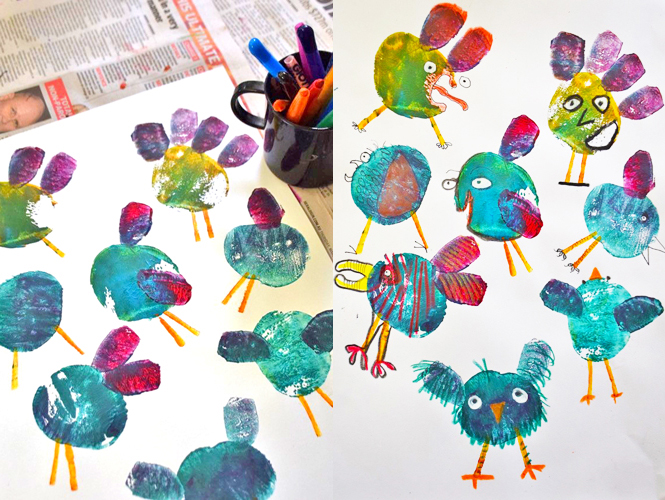
Step 7: Now go back to that first printed sheet of potato halves.
Take a black marker, crayons or any drawing materials you have, and draw over the top of the prints to turn them into faces.
Create funny characters, creatures or monsters. Add further details such as legs, tail, horns, eyes, teeth, scales, fur, claws etc.
Ask your students:
What else could these shapes be?
Again, ask questions or offer prompts if stuck. The more they do the easier it will get.

Discussion / Reflection
- What shapes did you use?
- How did you make your shapes into a picture?
- Do you know how to make a pattern?
- What happens when you mix colours together?
- What other things do you think you could print with?
Materials & Equipment
- Potatoes
- Acrylic Paint (Primary Colours; Red, Blue, Yellow)
- A3 Paper
- Cutting Knife
- Drawing Materials (markers, pencils, crayons, etc)
- Paint Palette (or Paper Plate)
- Sponge / Foam dabber
- Cookie Cutter (optional)
Don’t have these materials at home?
Click Here to view recommended materials
Inspiration
Related Artwork, Links & Sources
Research online how to draw cartoon eyes, faces, facial features, etc. Use these as guides / inspiration to create your own ‘potato faces’.
Share Your Outcomes!
How did you go!? We’d love you to share your artwork with us on Facebook or Instagram!
#zartart

