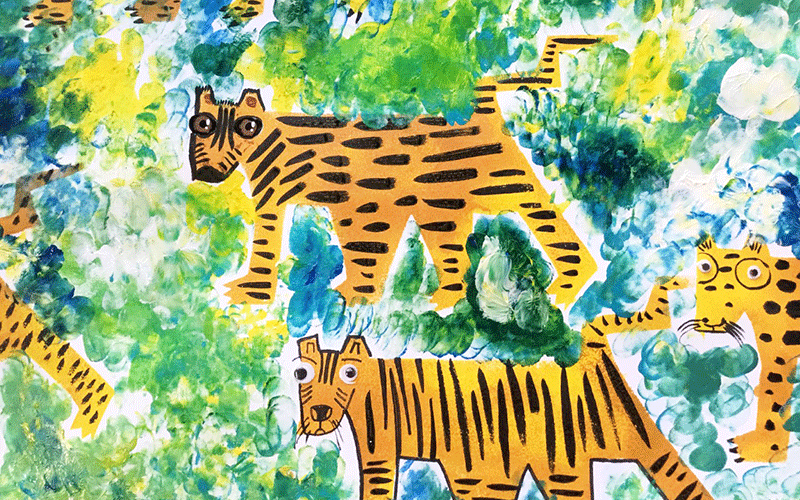
Jungle Animals
Year Levels: 3 – 6
with Kylie Wickham

Click Here to download Lesson Plan
Overview
Create a jungle type picture using stencil techniques and paint. Students will explore the repeated image using stencil and work with these images to create their own picture.
When completing the picture students will consider background choices; students may want to continue to stencil with plant/ leaf like shapes or they may wish to abstract the background with finger painting/ finger tapping techniques.
Art Elements & Principles
Colour, Pattern, Shape, Texture
Learning Objectives
Students will:
- Explore imagery using stencils.
- Explore textures and animal skin patterns.
- Make stencils using drawing and cutting skills.
- Consider shapes and cutting skills.
- Consider details on animals, these details bring your pictures to life and create character and interest.
- Discuss what textures you would see on the animal and how to accomplish this.
- Discuss and think about backgrounds and contrasts.
Make
Create Artwork
Step 1: Take your Kraft card and cut to A4 size. Draw an animal
e.g. a big cat.
Step 2: Fold your picture or pinch a section of it so you can make a small cut.
Once you can make an incision with your scissors, cut the shape out to make a stencil of your animal.

Step 3: Place your Kraft card on top of your A3 paper
*You may wish to tape the sides, so it doesn’t move.
Step 4: Using your paint dabber, dip the tip into some Acrylic Paint of your colour choice, and dab onto your animal stencil in a straight up-and-down motion. Carefully paint up to all the edges.
Step 5: Remove your stencil and move it around the paper and repeat the process, careful not to place the stencil on top of wet paint as it will pick up wet paint and you will get it everywhere. This will force you to make your stencilled pictures go over the edge of your paper and this in turn will help your composition.
Allow to dry.


Step 6: Take your black marker and create animal skin or patterns on your creature. You can either draw eyes or add joggle eyes or sticker eyes as an option. Have fun with your animal skins, they don’t have to be realistic – you can use your imagination!
Step 7: For the background you have options.
You may not wish to have a background. Alternatively, you might like your animal on the white paper and leave it as a finished work.
Step 8: Background idea 1 is to take another piece of Kraft card and cut out grass or leaf shapes and repeat the stencilling process.
Step 9: Background idea 2 is to take your fingers and finger paint around your animal by tapping blue and yellow primary colours to create a variety of greens.

As an extension, you decide on how you are going to finish and present your work.
You may wish to make several pieces and try different backgrounds as you have made a stencil and can use it multiple times.
Discussion / Reflection
- How did you know what patterns to use on your animal?
- How can you create different pattern and textures for different animals?
- What is Naive Art?
- Who is Henri Rousseau?
Materials & Equipment
- Brown Kraft Card
- A3 Cartridge Paper
- Foam Paint Dabber
- Acrylic Paint
- Scissors
- Masking Tape *(optional)
- Black Marker or Black Brush Pen
- Joggle Eyes or Sticker Features
- Grey lead Pencil
Inspiration
Related Artwork, Links & Sources
Share Your Outcomes!
How did you go!? We’d love you to share your artwork with us on Facebook or Instagram!
#zartart

