The Ever-Changing Collage
Year Levels: F – 4
with Kylie Wickham

Click Here to download Lesson Plan
Overview
In this lesson, students will explore colour, shape, placement and composition. Using stencilled negative shapes students will isolate compositions to create strong images.
This lesson will explore sensory experiences through use of colour, cutting and tearing paper.
This is an intuitive lesson incorporating mindfulness, experimentation and play, and helps develop fine motor skills.
Art Elements & Principles
Shape, Colour, Line
Vocabulary
Cut, tear, negative, positive, stencil, continuous, composition, placement, layer, warm, cool
Cross-Curriculum / Capabilities Links
Language, Maths
Learning Objectives
Students will:
Explore tearing and cutting shapes. Students should use entire sheets of paper. (not just the cut-out shapes, but the leftover scraps also)
Create layers and explore using different sizes and shapes in their artwork. (Shapes within a shape; shapes around another shape; positive and negative shapes)
Consider composition, shape and colour. Look and think about which colour/shape is pleasing to the eye when placed in a certain position.
Discuss composition, positive space & negative space.
Make
Create Artwork
PREPARATION:
Step 1: Start by collecting an assortment of papers to use. They can be of any type; colour paper, patterned paper, scrap booking, your old drawings or paintings, magazines – anything!
*Tip: It’s a good idea to work on old newspapers; this will protect your worktable surface and allow you to take the glue all the way to the edge, using the newspaper to catch the overflow. When the newspaper becomes too sticky, turn over or discard for a fresh surface to work on again.
It’s also handy to use a small piece of scrap cardboard to ‘smooth’ your paper edges when gluing.
Step 2: Spend a little time tearing and cutting your papers and collect them on a tray or in a bowl.
MAKING:
Step 3: Begin with a piece of A3 Black Paper as your background.
Start gluing your assorted torn/cut papers onto your black background using a glue stick. Start with larger shapes, building in layers, adding smaller shapes last.
Step 4: Keep growing your collage by adding a mixture of different papers and shapes. Build smaller shapes on top of / inside larger shapes. Overlap papers. Experiment with patterns, contrast, and colour.
For example, you may decide to make a ‘colour rule’ for your collage. i.e. Only black and white, cool colours, primary colours, etc.
Step 5: Take time to explore your collage as you work. Use a camera or smart device to take photos of your progress along the way, playing with the composition for different photos by cropping or zooming-in on sections of your artwork in interesting ways.
*If you don’t have a camera or smart device to take photos, you may like to make a ‘viewfinder’ to explore cropping and focusing in on sections of your artwork. Do this by folding a piece of paper in half and cutting out a ‘window’. Place your viewfinder over your collage to crop out / focus on different sections at a time.
Step 6: Continue to build your collage until you are happy with the overall composition. (You can always go back add to it later if you choose to)
Step 7: When ready, take another piece of A3 Black Paper and fold it in half lengthways (portrait)
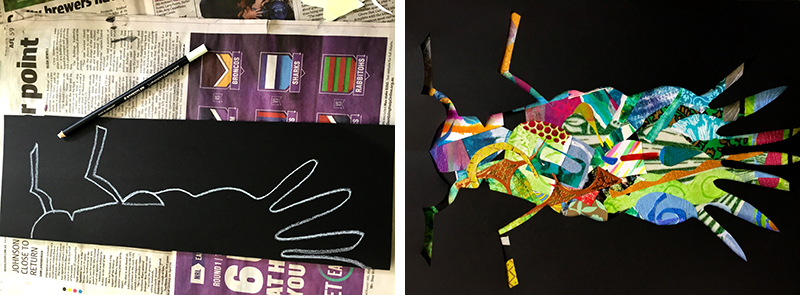
Step 8: Next, use a white pencil, crayon or chalk to draw a simple one-line shape starting a 3-4 cm from top of page and finishing 3-4cm from bottom of page.
*A greylead pencil will also work fine, but it will just be a little more difficult to see on the black paper.

Step 9: Cut-on-the-fold along the line of your shape in a single cut.
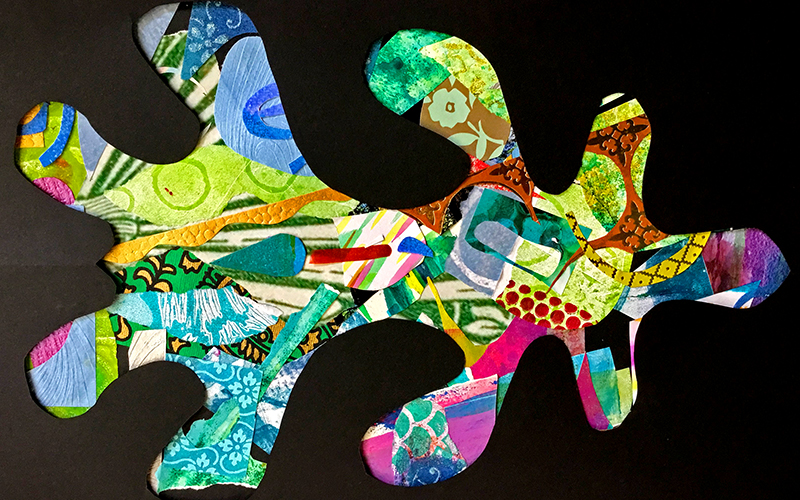
When you unfold the paper, you should see your shape cut-out to create a stencil. This ‘window’ shape is your negative space.
Place the paper over the top of your collage, but do not glue it down.
Step 10: Now take a third sheet of A3 Black Paper and repeat Steps 7-9; Folding, drawing and cutting a single-line shape.
*Extension for older/advanced students: For your second shape, try drawing something more complex. You might draw half an insect, tree or other design shape.

Step 11: Experiment with your collage by swapping the negative stencil used on top or flipping or turning the stencil shape around.
Display your every-changing collage by mounting in a picture frame – but do not glue the pieces down.
This way you can remove the collage and negative stencil and swap/rearrange them at any time, or you may like to continue to work on the collage – changing the artwork in any way you like!
Discussion / Reflection
- Do you have a favourite shape to cut?
- Did you use your left-over collage pieces in your work?
- What is the difference between a shape cut on purpose and a random shape found in your scraps?
- Can you find “mini art works” within your larger art work?
Materials & Equipment
- Scissors
- Glue stick
- A3 Black Paper
- White Pencil / Crayon / Chalk
- Patterned / Origami Paper
- Assorted / Scrap / Recycled Papers, such as:
Colour Paper
Patterned Paper
Handmade Paper
Hand-decorated Paper
Newspapers
Magazines
Old Maps/Melways
Don’t have these materials at home?
Click Here to view recommended materials
Inspiration
Related Artwork, Links & Sources
Share Your Outcomes!
How did you go!? We’d love you to share your artwork with us on Facebook or Instagram!
#zartart

